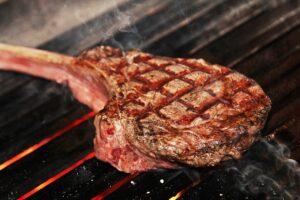
Are you a barbecue enthusiast looking to take your grilling game to the next level? Building your own smoker is a great way to achieve delicious, smoky flavors right in your backyard.
In this article, we will guide you step by step on how to build your own ugly drum smoker using an oil drum. So grab your welding gear and get ready to embark on a fun DIY project!
Materials and Tools You’ll Need
Before getting started, let’s gather all the necessary materials and tools for the job. Here’s a handy list:
Materials:
- 55-gallon oil drum (new or used)
- Grill grate
- Steel mesh
- Nuts and bolts
- Fire basket
- Charcoal
- Wood chips
Tools:
- Welding equipment
- Angle grinder
- Center punch
- Cutting torch
- Wire brush
- Safety gear (gloves, mask, goggles)
Step 1: Preparing the Drum
The first step is to clean the inside of the drum and remove any oil residue. Use an angle grinder with a wire brush attachment to scrub off any rust and dirt. It’s important to ensure that the drum is completely clean before proceeding.
Step 2: Marking and Cutting Holes
Next, mark the holes on the drum for ventilation and grilling supports. Use a center punch to make precise indentations before cutting. This will help you avoid any mistakes while using a cutting torch to make the holes.
Step 3: Welding and Assembling
With the holes marked, it’s time to grab your welding gear and start assembling the smoker. Weld the grill supports and fire basket into place, ensuring they are sturdy and secure.
Step 4: Seasoning Your Smoker
Now that your ugly drum smoker is assembled, it’s important to season it before use. This involves coating the inside with cooking oil and heating it to a high temperature. This process will eliminate any potential contaminants and create a protective layer for future use.
Step 5: Firing Up Your Smoker
Once your smoker is seasoned, it’s time to fire it up! Fill the fire basket with charcoal and wood chips for flavoring. Use a propane weed burner or torch to ignite the fire. Let the fire burn until the temperature reaches your desired range, usually around 225 to 300 degrees Fahrenheit.
Step 6: Smoking Your Meat
With your smoker up and running, it’s time to put it to the test. Place your cuts of meat on the grill grate, making sure to leave enough space for airflow. Close the lid and let the heat and smoke work their magic. Keep an eye on the temperature, adjusting the vents as needed to maintain a consistent heat.
Tips and Tricks for a Better Experience
- Use food-grade materials to ensure the safety and quality of your smoker.
- Consider using a new drum rather than a used one to avoid any potential contaminants.
- Experiment with different types of wood chips for unique flavors.
- Keep the inside of the drum moist during the smoking process by placing a pan of water inside.
- Add a second grill above the fire basket to create additional cooking space.
- When cleaning your smoker, use a wire brush to remove any residue from the grate.
That’s it! You now have the basic knowledge to build and use your own ugly drum smoker. Remember, practice makes perfect, so don’t be discouraged if your first attempt isn’t flawless. Keep experimenting and perfecting your craft to become a true pitmaster. Happy smoking!
List: Tools You Need
- Welding equipment
- Angle grinder
- Center punch
- Cutting torch
- Wire brush
- Safety gear (gloves, mask, goggles)
